somewords
Showing posts with label DIY. Show all posts

Monday, April 2, 2012

A little artsy, a little fartsy.

I'm sprucing up the master bedroom. Or re-doing it. Or just doing it for the first time really. Whatevs.

I bought two of these bamboo frames from goodwill for 6 bucks a pop. As um, lovely as the prints are I decided to swap them out. I painted the frame gold with some Martha Stewart craft paint, painted the mat black to cover up the faded green bits, pulled out a bit of map from an old atlas and called it good. Except that since this is going in our room I decided to pick a map with personal meaning for Gary.


A sweet little heart over Scotland, where he spent two years teaching and serving for our church.

What about you? Anyone else working on a neglected space in their home? Have you whipped up any art lately?

Wednesday, October 26, 2011

Nursery Recap

The time has come all too soon to move C into her big-girl room. I would gladly keep her in the nursery until we are expecting another kid (which we absolutely are NOT at the moment) but her room shares a wall with the living room; this wouldn't be a problem but recently she has taken to kicking the wall as hard as she can when she is in her crib and it's making my frames fall off of the wall. No bueno.So our solution is to move her into a room where her wall-kicking habits won't interfere with precariously hung sheets of glass and beloved art. Before I get to the inspiration for her room (and before I do any work on it) I wanted to re-document her nursery...that sweet little space I so lovingly slaved over.

***Some time ago my first blog was accidentally and irrevocably deleted. Thanks to my SIL some of the posts were saved though the pictures were lost. This is a repost from that original blog***

ORIGINAL POST DATE: 5/8/2010 (I've edited it here and there since)

I promised a few of you that I would post in-progress pics of the nursery. Originally I was going for clean lines and mid-century minimalism. With vintage fabrics. And a few vintage pieces. And then things just kept changing. So now I think it is looking a little more "vintage lived-in but not shabby chic" which is fine since I have an inexplicable love of what has been loved, and we have a lot of that on hand. Ultimately I think it looks pretty clean and sparse, rather than frilly and overdone. I just keep editing whatever makes its way in to the room to keep the clutter down. So, on to the goods.

To date we have:
*painted the walls a light blue
*painted the ceiling/closet/shelf above dresser a slightly deeper light blue
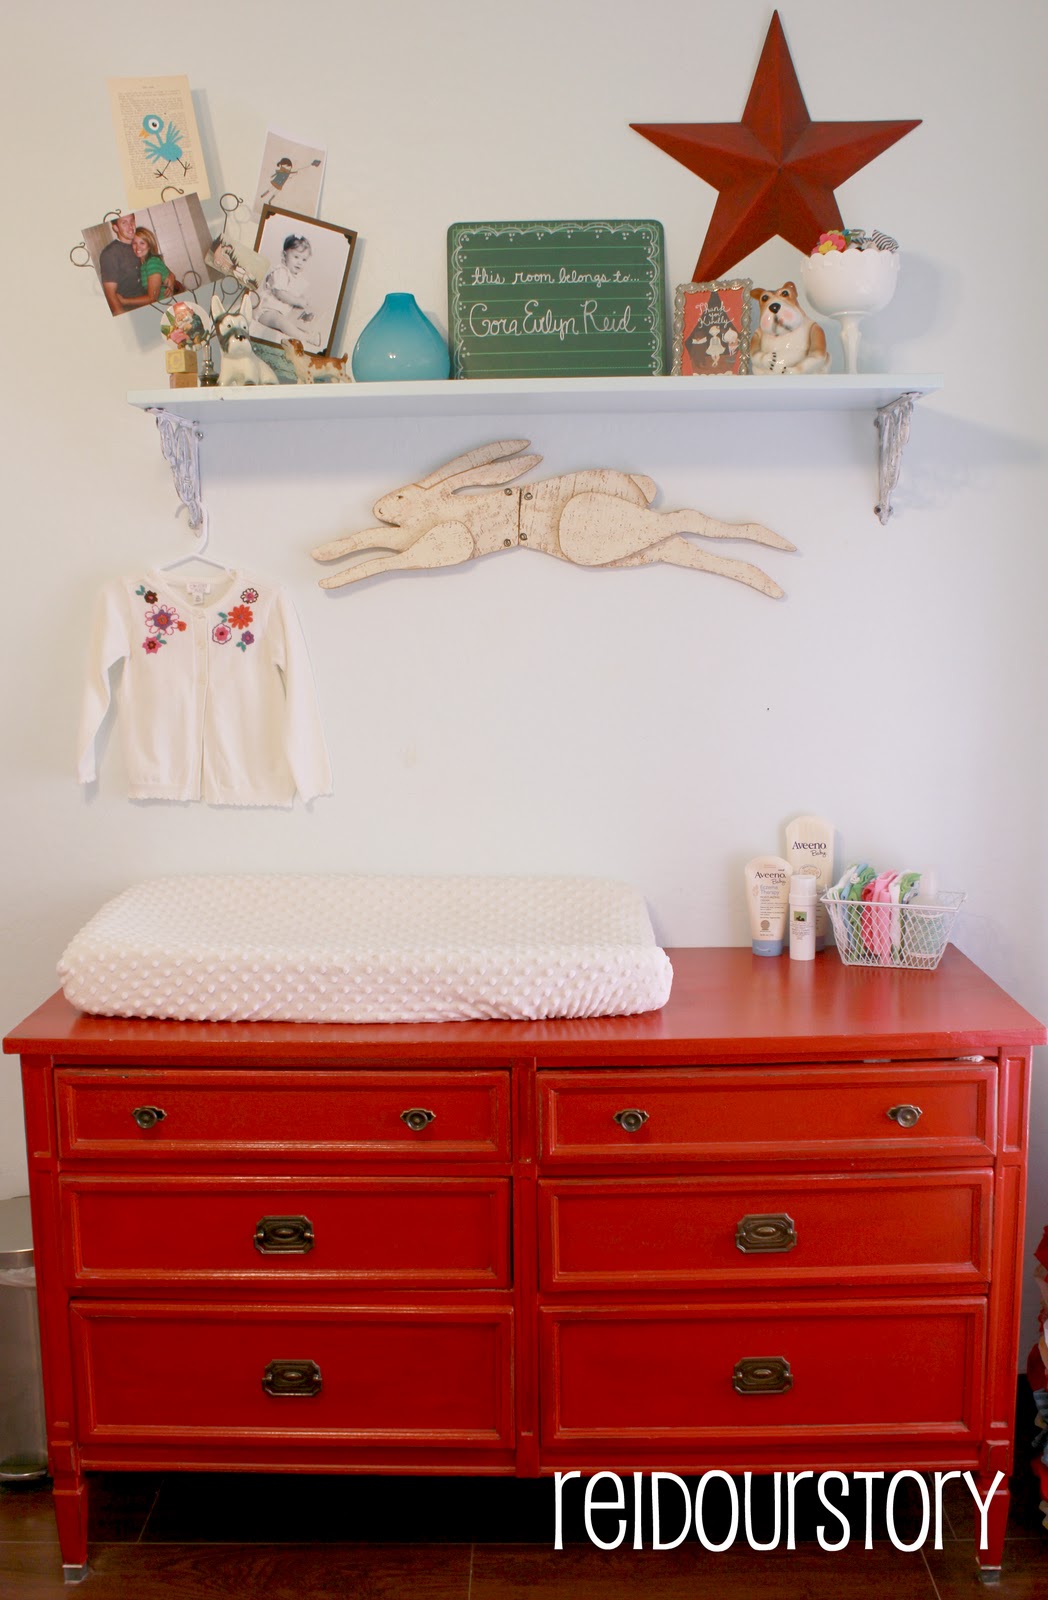
*refinished the dresser
*removed the closet doors
*purchased and assembled a crib. The crib is Ikea's Gulliver, and we bought it off craigslist for $50 (score!)
*the side table was something like $12 and I bought it about a year ago. It was living in our guest room, but I moved it to the nursery and replaced its spot in the guest room with one of Gary's drums for now (I actually like the way the drum looks, but I don't think Gary is wild about it, so we will see who wins this decor-debate. Me. Probably always me.)
*Gary put in the ceiling fan, and while I would have loved a chandelier or other funky light fixture, in Arizona there is just no going without a ceiling fan.
*I hung a shelf above the dresser. I bought the cast-iron brackets at Hobby Lobby, slapped on some white craft paint, and then wiped most of it off to make it look distressed. I think I paid like $8 for both brackets since they were on sale that week, and the piece of wood was five or six bones at Home Depot. Paint was leftover from the ceiling color.
*we picked up all of the red bins in the closet at Target, and the basket-drawer system thing is from Ikea.
*White curtain panels were on clearance at Target for like $8 for the pair and I also found a cute curtain rod with crystal finials at Hobby Lobby. I had to spray paint the rod white since it comes in a bronzey finish but they were MUCH less expensive than other places I looked (*cough*pottery barn kids*cough*).


 The crib with the fabric banner I made. Some of the fabrics are new and more graphic (like the Amy Butler lotus fabric) but most are vintage sheets and pillowcases from my collection. Oh, and a few doilies thrown in for extra vintage charm. The framed bibs were mine as a baby. I added the pom trim to the curtains but if I had to do it again I would order some of that fancy-pants jumbo pom. Go big or go home, right?

 I love this dresser...even though the drawers stick. 


Here is the mid-century nightstand with the chair I never did get around to recovering. Ah well, c'est la vie, right? I would like to sew up a slipcover for it, at least for the next kid but that's not something I have to worry about now.

 The drawer basket thingy (very technical term there) is from Ikea and we use it to keep toys, blankets and extra wipes/diapers handy. 


Close-up of the Hobby Lobby bracket. I love this store. Can you be soulmates with a store? Or with multiple stores (since Target is obviously my first)? On the floor there you can see some of the crap that will eventually go up on the walls: some embroidery I did, a vintage bib passed down from my mom, some prints from the original Alice in Wonderland novels, plus family pictures, some more hand-crocheted doilies I've collected over the years, and two Emily Martin prints that I finally bought. I've also been bugging Gary to whip up some art for the room (since we are trying to incorporate as much handmade "stuff" as possible to pass down to the little girl) but he has yet to get to it. Maybe because I keep him busy hanging fans and building shelves and painting?


We still have a loooong way to go. Which is kinda too bad since C is about to get evicted. We want to get the crown molding installed and all of the trim painted bright white (seriously, all of the trim in the house is pinkish creamy "white" and maybe it looked great with all of the tan and brown they previous owner had going on, but now? It makes me want to barf. Blech.) We got the flooring done but the base still needs to be installed in here.

So:
1. install/paint crown and trim
2. install/paint base
3. figure out chair situation/sew slipcover for vintage rocker

Thursday, February 3, 2011

The First Step Is Admitting You Have A Problem...

Hi, my name is Holly and I'm a decorating addict...or rather, I have a severe (and seemingly incurable) case of decor ADD. You can ask my mom, I've been weird about arranging and decorating "my space" ever since I was a kid. It would drive my mom nuts when I wanted to completely re-do my room every year, but I've come to embrace that as part of my need for a creative outlet. It would be nice if my outlet were something inexpensive (or free) like writing, or painting, or gardening. Believe me, I've tried all of those things and many many more, but I keep coming back to my space. Call it a sickness, but I have made my peace with it.


My latest victim is our living room. The one that I finally had "done" as of a few months ago. At least, it was as done as it was going to get without new flooring, a new couch and some recessed lighting. And we liked it. A lot. And then I got tired of it.

So. I've been mulling over what to do about our "entertainment center" setup...the bookcases were too much visual clutter and waaaaaay too much horizontal surface for my taste (it took like 40 minutes to dust that sucker! No thanks.) I've been trolling craigslist and thrift stores looking for a great dresser to take the place of the bookcase under the tv, but everything I found was either a) too ugly or b) too expensive. I did tend to find great potential pieces, but they always popped up right around the times when dropping an extra chunk of change was just not feasible.This is the look I was going for:


I know it's pretty standard fare these days, but I like the idea of drawers (keeps dust off of dvd's and video game crap) and it's affordable, and frankly, while I love me some ikea (like, I'd marry it in a heartbeat love) I have always felt like it was starter furniture. It is the kind of stuff that is great in small doses, but too much feels like "hi, I just graduated college and am finally getting into my first 'grownup' place so I'm on a limited budget" kind of thing. And while we did  just get our first grownup place (a year and a half ago) and we are almost college grads, I'm ready to move on from the ikea life. We already have a tried-and-true ektorp couch in the room, and it was more fiscally feasible to replace the bookshelf setup, so the hunt was on for a new dresser/tv stand.

And then, THEN I found what I thought was an amazing deal on CL for a great big hideous dresser with matching mirror and headboard, for 80 BUCKS! It was still more than I wanted to pay but with the money I made selling our two bookcases I was able to grab it and still have a little cash left over for the supplies to repaint it. Sweet. I say "I thought" it was a great deal because it looked like solid wood in the add, but when the Mister got it home, it turned out to be part wood, part composite, part plastic. Yeah, plastic.


Yikes.

Do you see that glorious brassy hardware?! I'm pretty sure this is not something you want your kid banging their head on, but we will cross that bridge when we get to it. Because I'm a good mom like that.
                                         
The dresser is still going to work just fine, but I'm not sure what to do with the headboard and mirror. I had planned on selling them to bring in a little more cash to make the small bookshelves to flank the dresser, but who is going to want to buy a PLASTIC headboard and mirror?? Even if they do have a great vintage feel...would you?? Maybe if I paint and spiff them up first?


 We got started today while C went down for a nap. I took off the hardware and the Mister took a brush and vacuum to clean the dirt and dust off the drawer faces. There are a ton of nooks and crannies in the faces, which is what I love about them, but they were kinda gross from sitting in the previous owner's home.  


 After we taped plastic garbage bags around them (which was one of my more brilliant ideas...worked like a charm!) I threw on a thin coat of primer, because in case you forgot, the drawer faces are PLASTIC. Sheesh. Usually with primer I use regular old kilz in a can, but while we were picking up painting supplies I noticed that there was kilz IN A SPRAY CAN!! Genius. Pure genius. It ended up going on pretty well...we did have to wipe down the nozzle after each  face because there was some buildup that caused dripping. However, I only got primer on ONE fingertip (I have a knack for getting primer all over my hands for some reason, and it is just the most impossible thing to try and clean off) so I'm calling this one a success.

Primer on the drawers has dried so in the next couple of days we will prime the dresser and then slap on some paint thanks to a sprayer we borrowed from friends (fingers crossed it works better than the one we bought to do our kitchen cabinets with!) After that all that is left it putting it back together with a new top we are building from 1x4 planks and we're done!